
For this section, we’re going to walk you through five ways (from least to most complicated) to troubleshoot the “This site can’t be reached” error. Let’s start with the simplest fix, which involves checking your connection.
Even if you have a working internet connection, the “This site can’t be reached” error can appear if there’s any type of error with it. Although it may sound too simple, restarting your router or modem can often resolve this problem quickly.
Since restarting your connection usually only takes a minute or two, this is the first solution you should try. Most internet service providers (ISPs) will recommend disconnecting your router’s power cable and waiting a full minute before reconnecting it. Once it’s back on, wait for your internet connection to reset, and then try re-accessing the website.
In many cases, your operating system’s (OS) built-in firewall — or whichever software you use — can block pages aggressively and prevent your computer from establishing a connection to them. The easiest way to figure out if that’s the problem is to temporarily disable your firewall and antivirus software, and try visiting the site again.
Depending on what OS you’re using, you’ll need to follow a different set of steps to disable the built-in firewall. You can use the following articles for guidance:
As for disabling your antivirus software, your settings will depend on the tool you’re using. In our experience, it’s rare for your firewall to block you from loading a website unless it’s truly dangerous.
If disabling your firewall and antivirus software doesn’t work, it’s time to try a different method. Don’t forget to reactivate both before moving on.
While you navigate the web, Chrome stores a lot of data and files from the websites you visit. Your browser stores those files in a local cache, so it doesn’t have to reload sites in full every time you visit them.
In some cases, you might run into the “This site can’t be reached” error due to problems with your cached files. To solve that issue, you’ll need to clear your browser cache.
Assuming that you’re using Chrome, you can do that by going to Settings > Privacy and Security > Clear Browsing Data and selecting the Cached Images and Files option:

Click on Clear Data,and that’s it. Wait for Chrome to do its thing, and then try to reload the website that was giving you problems earlier.
Your OS stores a lot of data from websites you visit. It also stores their IP addresses in what we call the “DNS cache.” That way, your browser doesn’t have to look up the same IPs through its DNS server whenever you want to establish a connection. If that sounds familiar, it’s because the DNS cache works similarly to your browser cache, only it stores different types of data.
That’s a fantastic feature that saves every user time. However, it can also lead to errors if your OS caches outdated information for a website. In that case, you’ll need to “flush” or reset your DNS cache.
Flushing your DNS cache is a lot simpler than it sounds. We have a full tutorial on flushing your DNS cache on all major operating systems and browsers, so go ahead and check it out. If this doesn’t work, you might need to change DNS servers, which we’ll cover in the next section.
Your ISP automatically assigns you DNS servers for your connection. However, you can configure your internet settings to use a specific set of DNS servers.
In Windows, you can do this by navigating to Control Panel > Network and Internet > Network and Sharing Center, and then selecting the Change Adapter Settings option:
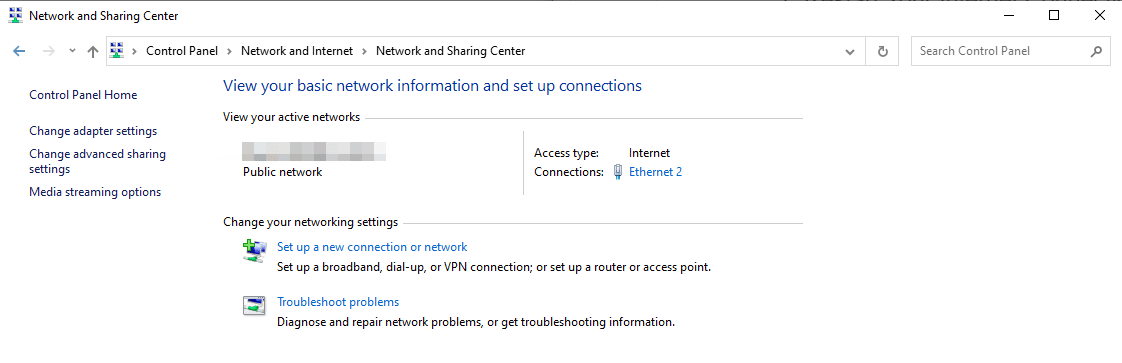
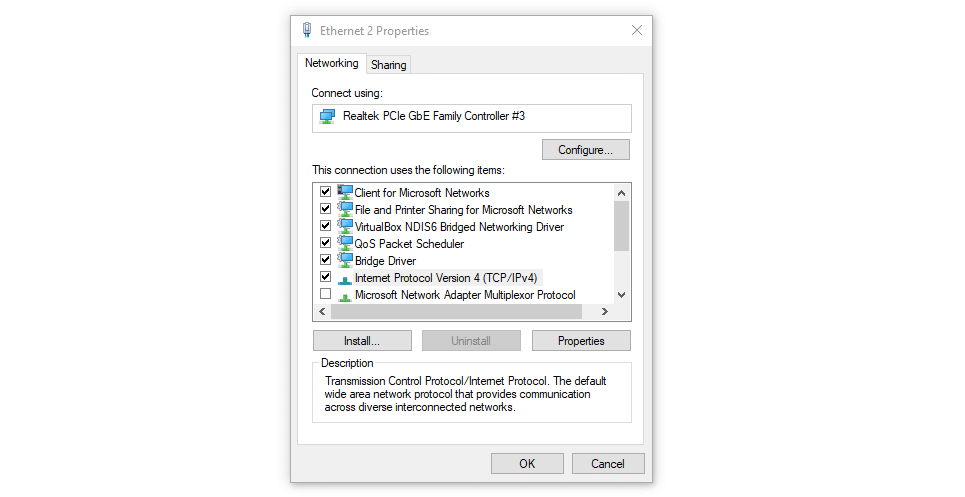
On the next screen, right-click on your active internet connection and select Properties. On the list that appears, select Internet Protocol Version 4 (TCP/IPv4), and click on Properties once more:
A new screen will pop up, including a section that enables you to set custom DNS server addresses. You can use the two fields in the screenshot below to enter the DNS server addresses you want to use:
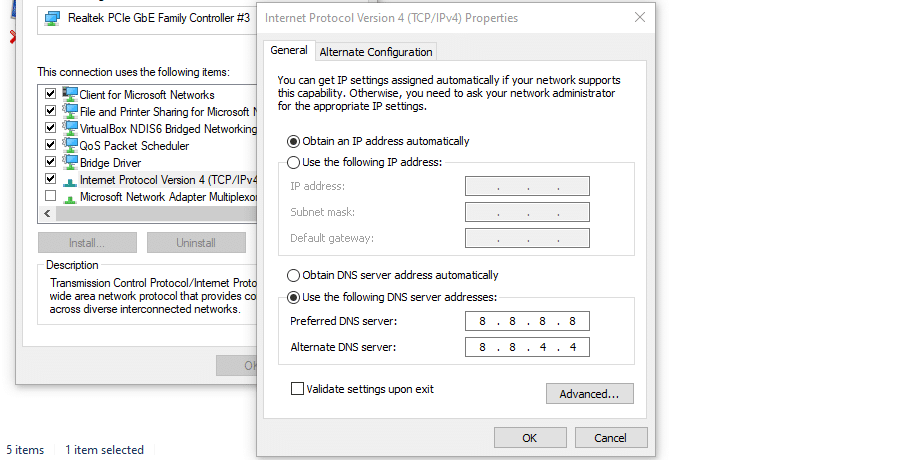
In the screenshot, we’re using Google’s public DNS addresses, which are “8.8.8.8” and “8.8.4.4”. However, there are a lot of fantastic free DNS servers you can use.
If you’re using macOS, you can change your DNS settings by navigating to System Preferences > Network, selecting your network, and clicking on Advanced. Next, jump to the DNS tab:
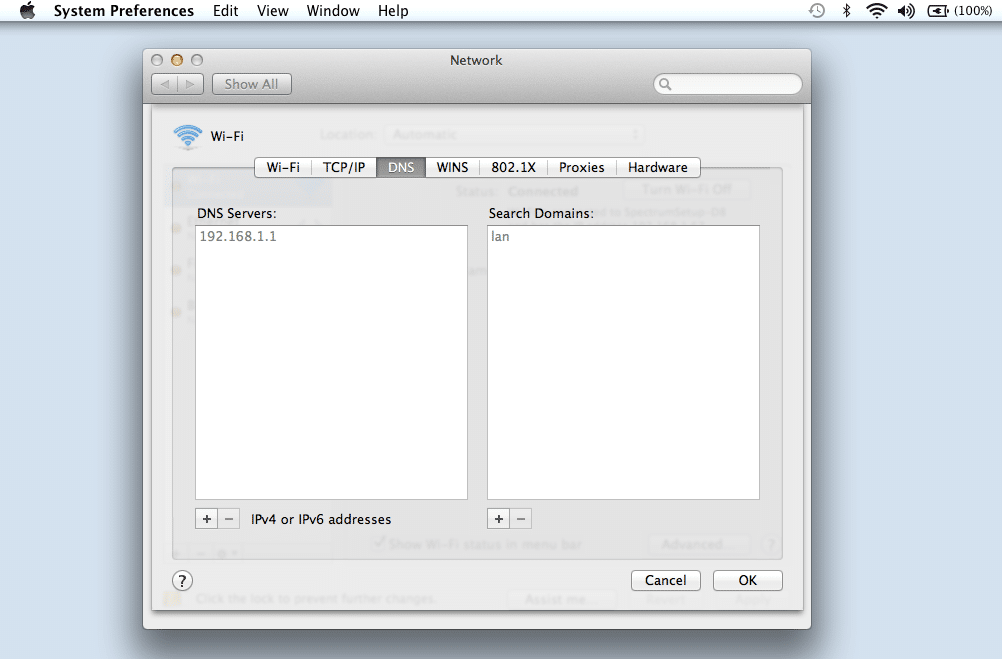
You can add the custom DNS servers you want to use by clicking on the (+) icon. Once you configure your new DNS settings and press the OK button, you should be good to go.
Your internet connection should work just the same, but the “This site can’t be reached” error will hopefully be gone. In some cases, changing DNS servers may let you load sites faster and access websites that you couldn’t before.